As we recall from our previous documentation SPEAK App Tutorial, we’ve already tackle Sitecore SPEAK and we have mainly discussed there the process of creating Sitecore SPEAK application using Sitecore Rocks and Visual Studio.This time, we will proceed on the other power capability of Sitecore –which is the privilege to customize SPEAK UI using query parameter.
SPEAK UI is amongst the latest sitecore discovery providing the quickest and convenient way for developing Sitecore Modules. Built upon standard and compatibility for languages or platforms such as Html5, CSS3, jQuery, Backbone, Knockout, Bootstrap and more.Since we have already develop SPEAK modules from our previous how to’s. Let’s assume that we’re all set. All required applications such as Visual Studio, Sitecore , Sitecore Rocks are already installed and running.
Introducing the types of pages supported by SPEAK
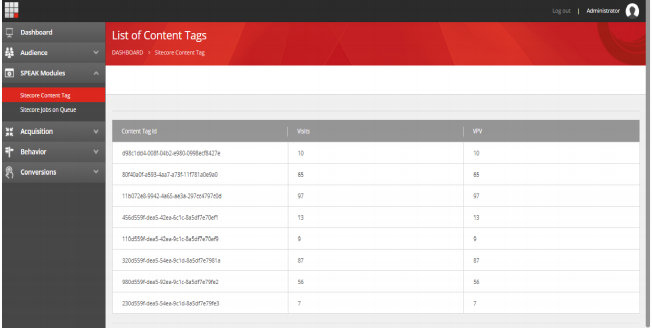
Dashboard Page – Displays an overview of data through graphs, images, maps etc. providing a way to drill down datas.List Page – Provides data in a list format, and typically includes search/find, querying and sorting functionality that narrow results.Task Page – Provides an interface functionality of creating, editing, or deleting data – most data manipulation would take place in this page.So, in this documentation, we will be using the List Page type which runs on Experience Analytics Dashboard under SPEAK Modules.Since our expected result would display a presentation of data, narrowing results list from SQL Analytics -one of the facts table named Content_Tags.
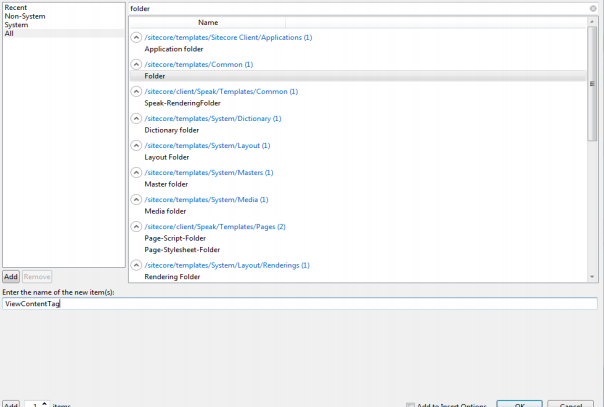
So, we’ll go through the process on how we got the above result. To create a customize speak component, we need to create the same folder structure which is located in our sitecore instance root folder under this path :“C:\inetpub\Instance Name\Website\sitecore\shell\client\YourApps\Name of your folder” which is ViewContentTags.

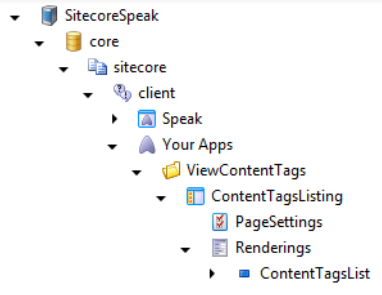
Overview on Folder and File Structure
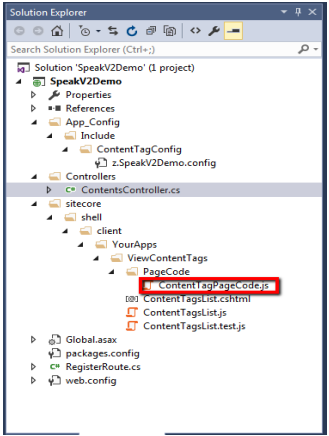
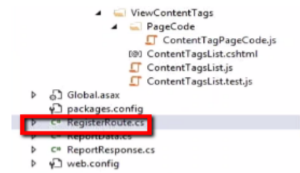
* Create a config file under App_Config\Include\ContentTagConfig\ add a new item web configuration file and name it z.SpeakV2Demo.config.* Create a Controller class under Controllers add a new item controller class name it ContentsController. * Create a Register Route class to map the route and use it on custom config file. * Create a Page Code undersitecore\shell\client\YourApps\ViewContentTags\PageCode\ add a new item Speak Page Code and name it ContentTagPageCode.* Create a Speak Component under sitecore\shell\client\YourApps\ViewContentTags\ add a new item speak component and named it ContentTagsList it will automatically create ContenTagsList.cshtml, ContentTagsList.js, ContentTagsList.test.js.ViewContentTags
First, create a folder under YourApps in core Database using Sitecore Rocks and named it ViewContentTags to create just right click YourApps —> Add —> New Item. Search a folder and named it ViewContentTags.
ContentTagListingNow, we will create a list page since our application will have to lists the data from Sitecore Content Tag reporting database.To create a list page, right click ViewContentTags —> Add —> New Item. Select Speak List page and name it ContentTagListing.

We have created the ContentTagsListing page which is useful for developers in monitoring sitecore content tag under ViewContentTags folder.
Renderings
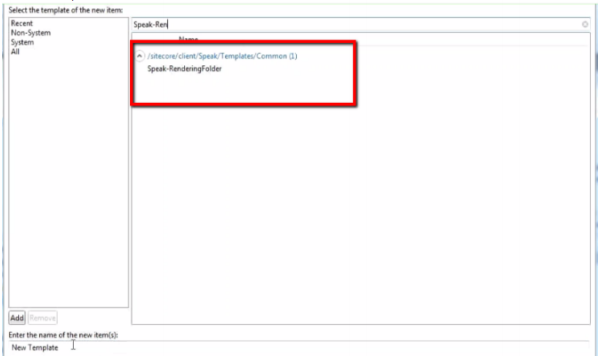
Create renderings to put your Custom Speak Component. To create, right click ContentTagsListing —> Add —> New. Then search Speak-Rendering-Folder on search text field and named it Renderings.
The Folder structure Under YourApps in core database Under ContentTagsListing, we have the following :
* PageSettings
* Renderings
Under Renderings ContentTagList Custom Component
Adding a SPEAK Component
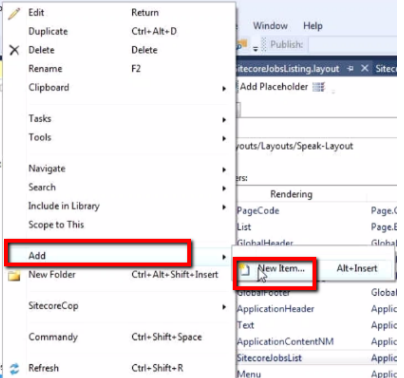
To create a speak component, go to your solution, right click on project folder which as you can refer in the image below. To create a speak component, go to your solution and right click on Project folder —> Add —> New Item. In this window under sitecore options you can see Speak option from which you can select SPEAK Component.
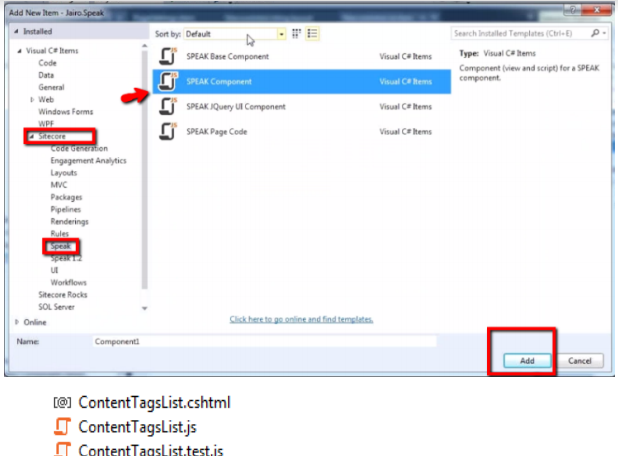
Then name the new item as (anything you want) which in my part, I named it ContentTagsList and then click on Add, it will automatically create 3 files (.cshtml file, .js file, .test.js file) then select where you want the custom speak component to be added which the best practices is to put it under Renderings. (See image below).

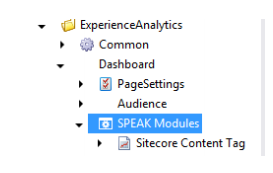
Add a DashBoard Panel in Speak
Using Sitecore rock in your Sitecore Explorer core\sitecore\client\Applications\ExperienceAnalytics\DashBoard\Speak Modules\To Create Speak Modules just Duplicate the Audience DashBoard Page and named it Speak Module.

Speak Module
Create a List Page Under Speak Module and name it Sitecore Content Tag.
Design Layout
The Design Layout of your Sitecore Content Tag should look like this.

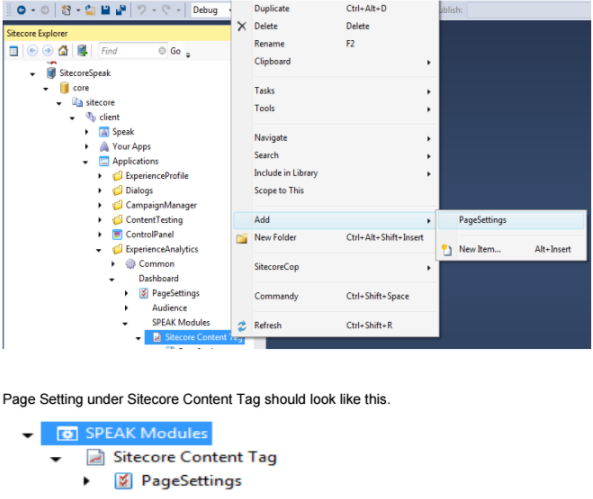
Add a Page Setting
Page Setting is an item based template located beneath from page definition item or the new item in our Sitecore Solution Speak /YourApps/Appications/ExperienceAnalytics/Dashboard
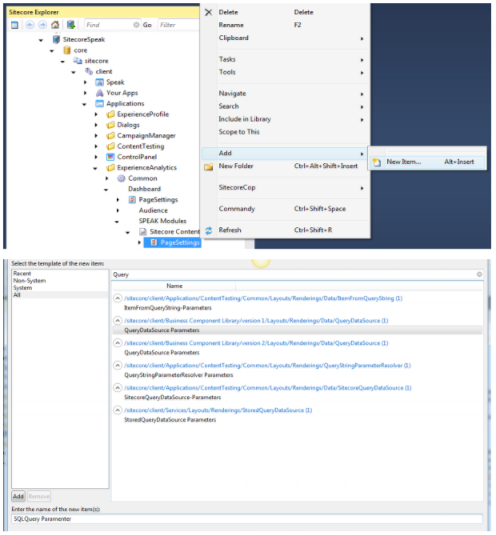
To add a page setting, right click Sitecore Content Tag —> Add —> PageSettings.
Add a sitecore parameter version 1 Query Data Source
- Right Click PageSettings —> Add —> New Item
- Named it SQL Query Parameter
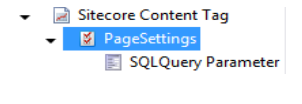
SQLQuery Parameter Under Page Setting should look like this.
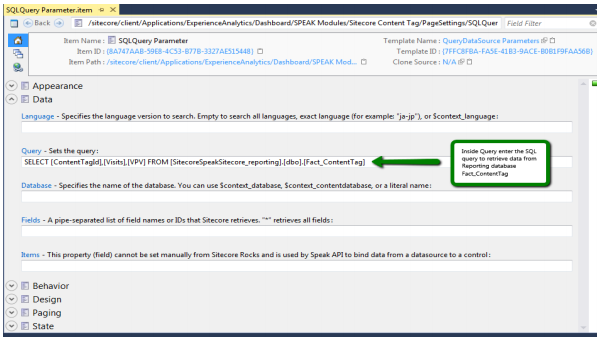
Query or Search Data Sourcea component use to locate, sort and retrieve Sitecore items based on specified root item. Basically, it will inherit datas from database, fields, id’s and etc. that would matched with the search query and pass the value to other component that would display it.* Click SQLQuery Parameter —> Data —> Query * Enter SQL Query to retrieve data from Reporting database table named Fact_ContentTag.SQL Query is used to retrieve data from reporting database SitecoreSpeakSitecore_reporting tablename Fact_ContentTag which is set to query SELECT [ContentTagId],[Visit],[VPV] FROM [SitecoreSpeakSitecore_reporting].[dbo].[Fact_ContentTag]
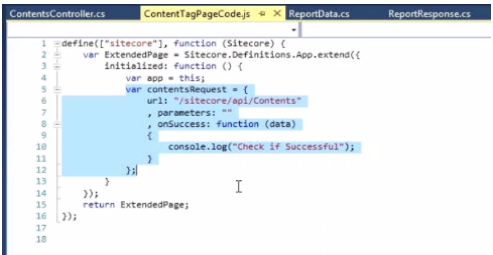
ContentTagPageCode.js
Create a contentsRequest function to call a Api inside Page Code so it will call contentsRequest everytime the page is access.
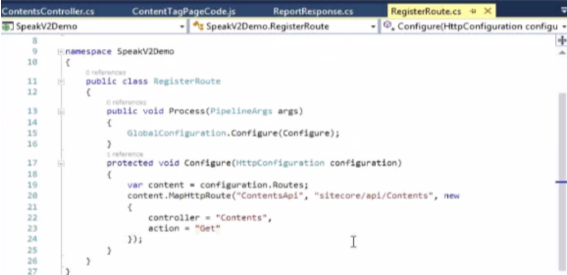
RegisterRoute.cs
Then, I used the RegisterRoute.cs to create custom route to map the incoming request to a controller named Contents and invokes the Get() Action.
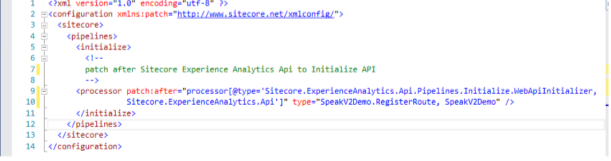
z.SpeakV2Demo.config
Create a custom config to patch the RegisterRoute.cs and to Initialize the API.
ContentTagList.cshtml

This will create a UI presentation in sitecore experience analytics. Displaying the names of table headers : Content Tag, Visits and VPV.

ContentTagsList.jsI’ve created a script under initialize:function to retrieve the API which returns the JSON object and create a table row and table data that will append to table header which I have created in ContentTagList.cshtml.
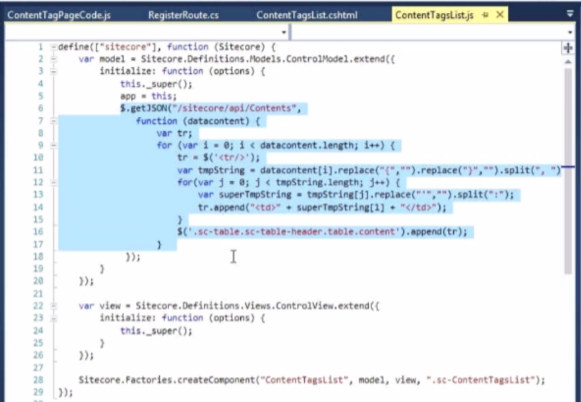
By checking the API, you browse it using this link NameOfSitecoreInstance/sitecore/api/Contents You’ll see this Json object that retrieves data from SQL query used in SQLQuery Parameter.

ContentsController.cs
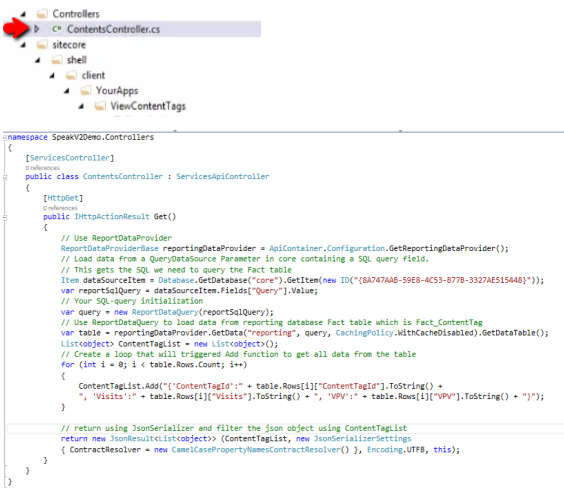
Far from my researched, I’ve read an article pointing the topic of querying Sitecore reporting database http://www.spixsoft.co.uk/?p=1907 which I found informative. So here’s the phrase: Sitecore provides a comprehensive analytics from the main dashboard, there may be a requirement to interrogate the analytics data directly in your code. To do this we need to make use of Sitecore’s ReportDataProviderBase and ReportDataQuery classes. These provide access to the reporting database using the parameters set in the Sitecore.Analytics.Reporting.config.Sitecore stores all its queries in items based in the ReportQuery template. As of Sitecore 8.1 these can be found at the following location Master/Web > sitecore > system > Settings > Report Queries.
I think we’re all good. I hope this post is helping you. Stay tuned in for upcoming posts. Thanks!

Leave a comment