As Sitecore pledge the tagline “Own the Experience”, they continue to seek the best solutions as possible for users perspective. Then Sitecore XP 9.1 initial release finally came out. Highlighting the best of experiences. Experience Management–Create, manage, and publish content to your website. Experience Platform–Collect and search experience data with xConnect and the Experience Database (xDB). Experience Commerce (9.0)–Customize your eCommerce solution through a flexible extensibility framework.
Sitecore 9.1 supports Helix and Habitat for development.(Read the content of provided links to fully understand its importance and benefits)
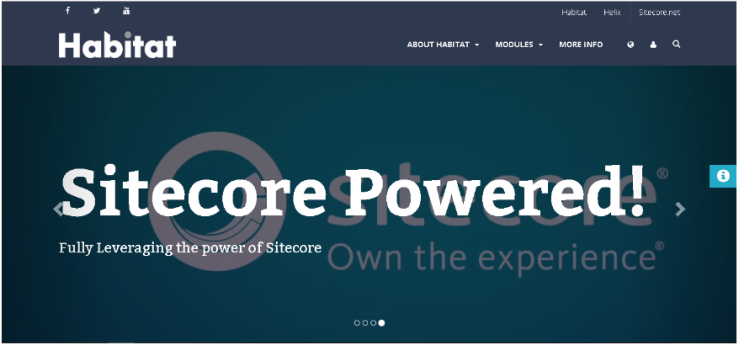
Habitat is an essential tool in learning Sitecore basics together with the Helix Framework since most of the projects made from Sitecore CMS is structured from the Helix Framework which consist of best practices and recommendations from Sitecore.
Now sharing you the simplest alternative steps and requirements needed on how to successfully install Habitat in Sitecore XP 9.1 (Initial Release) application.
Prerequisites:
- Sitecore Experience Platform 9.1Initial Release (assumption that this was already installed)
- PowerShell version 5 or later
- Node.JS 4+ (https://nodejs.org/)
- Visual Studio 2017
- .NET Framework 4.7.1 Developer Pack
- VS2017 extension Web Compiler
[Download URL:
https://marketplace.visualstudio.com/items?itemName=MadsKristensen.WebCompiler ]
Files Needed:
- Habitat-1.7.zip for (Sitecore 9.1)
[Download url:https://codeload.github.com/Sitecore/Habitat/zip/v1.7 ]
Instructions:
1. ) Enable ASP.NET 4.7
a. Open (Windows Feature on or off).
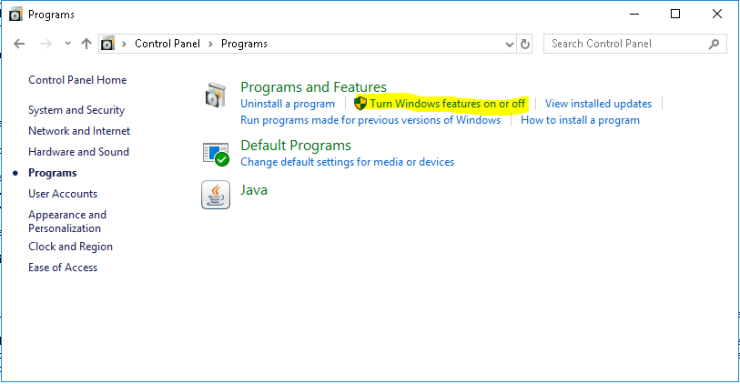
b. Check the ASP.Net 4.7
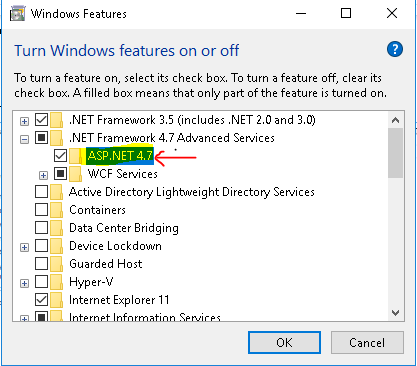
c. click the checkbox for ASP.Net 4.7 and Click Ok
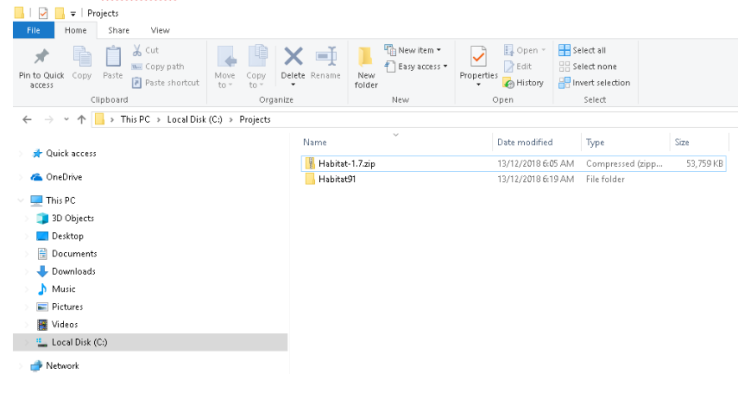
2.) Download and Unzip Habitat-1.7.zip package
a. Download Habitat-1.7

b. Unzip the package to a folder on your local machine, for example C:\Projects\Habitat91
3. ) Modify Config Files
Note: You must update the settings with the appropriate values for your environment.
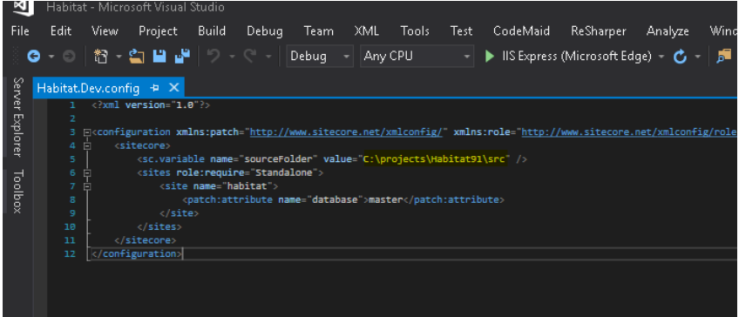
a. In the configuration folder, modify the following files:
i. Habitat.Dev.config
Modify the sourceFolder variable to match the path to your Habitat Src
[Location:.\src\Project\Habitat\code\App_Config\Environment\Project\Habitat.Dev.config]
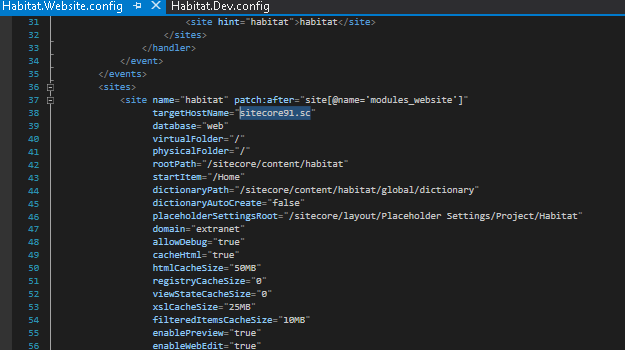
ii. Habitat.Website.config
Modify the TargetHostName variable to match the path to your Habitat Sitecore instance (example: sitecore91.sc)
[Location:.\src\Project\Habitat\code\App_Config\Include\Project\Habitat.Website.config]
iii. Gulp-config.js
Modify the instanceRoot variable to match the path to your Habitat Sitecore instance root (example: C:\\inetpub\\wwwroot\\sitecore91.sc)
[Location: .\gulp-config.js]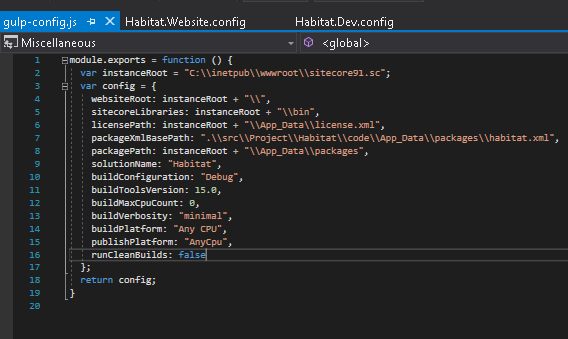
iv. publishsettings.targets
Modify the publishUrl to match the path to your URL
(Example: http://sitecore91.sc)
[Location: .\publishsettings.targets]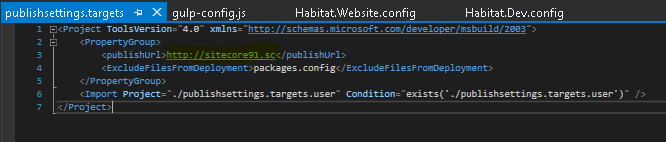
4.) Restore the Node.js Modules
a. Open command prompt as an administrator
b. Run npm install in the root of repository.
Note: If gulp has not been installed globally , run “npm install -g gulp”
5.) Build and publish the solution
Note: You can use either of this instruction.
a. Using Command prompt
i. Open an command prompt Run as Administrator and run gulp in the root of repository.
b. Using Visual Studio 2017
i. Open Visual Studio 2017 and Run as Administrator
ii. Open the Habitat solution.
iii. Open the Visual Studio 2017 Task Runner Explorer.
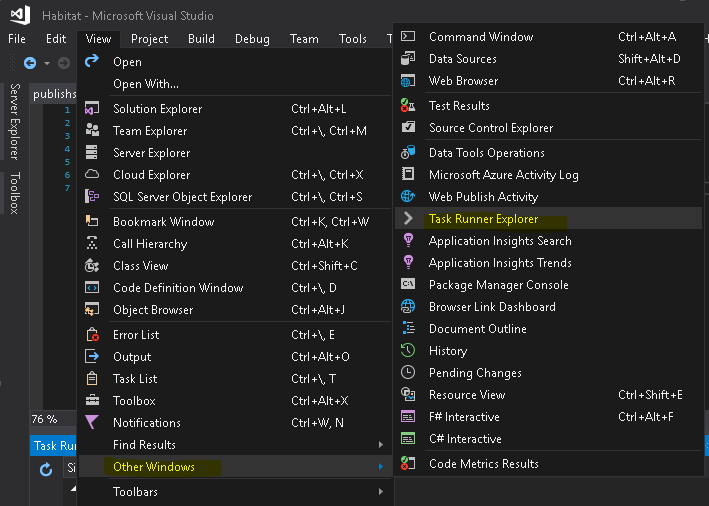
iv. Switch to Habitat Solution
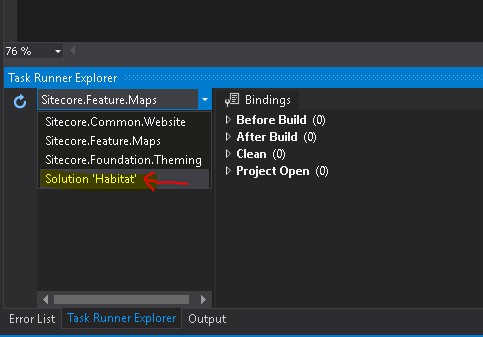
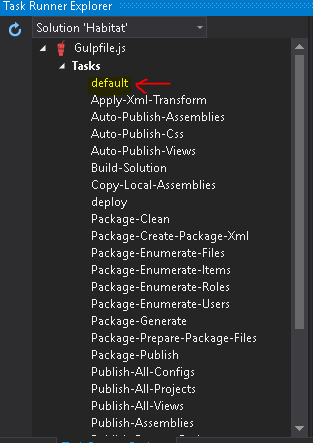
v. Run Task “default”
6.) Rebuild search indexes
a. Go to your Sitecore Instance (example:http://{sitename}/sitecore).
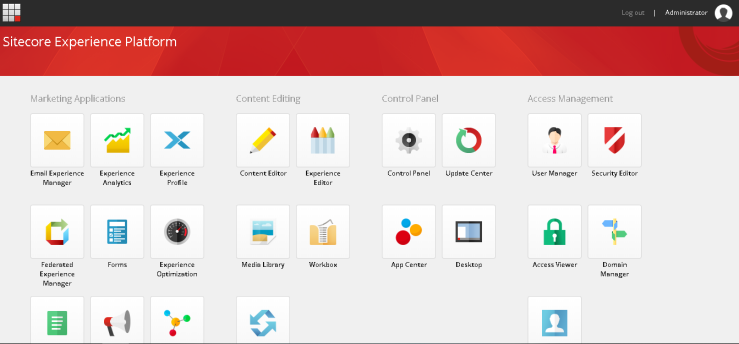
b. Go to Control panel
c. You need to click the Indexing ManagerSelect sitecore_master_index and sitecore_web_index.
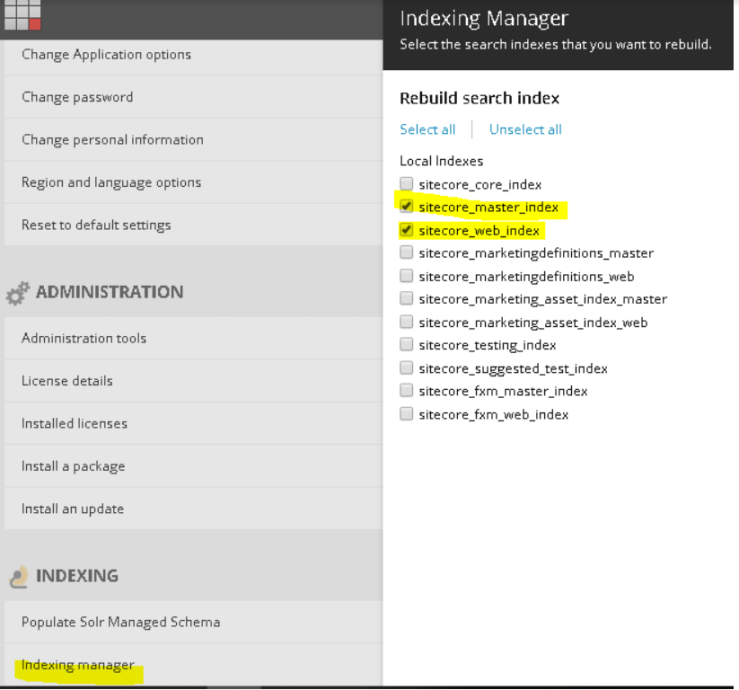
Note: This is required for Habitat search-based features to work properly.
d. And now click Rebuild.
7.) Now open your browser to check the site.
Resources:

Leave a comment